
How to Raise a Sunken Concrete Sidewalk: What Works & What Doesn't
Almost any sunken sidewalk can be brought back to level. What decides whether it stays there is the ground underneath, and whether that ground is still moving. Here is how to measure the drop, find out who actually owns the walk, and tell the repairs that fix the surface apart from the one that fixes the soil.
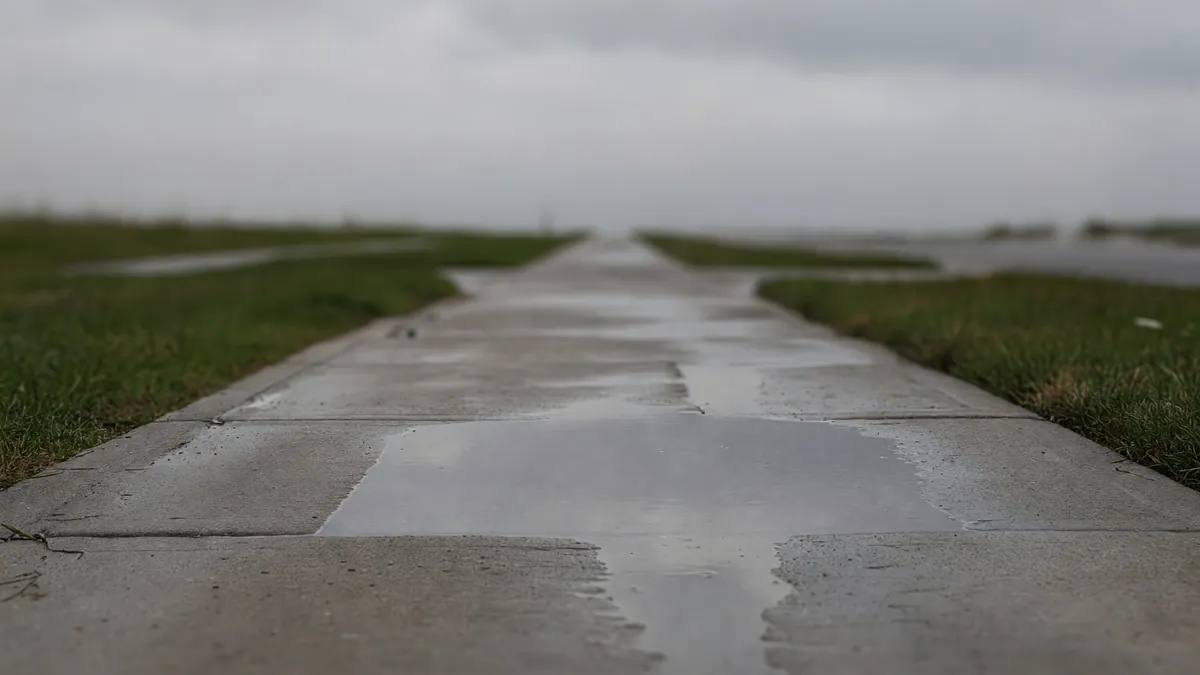
You catch your shoe on it. The same spot every time — the front edge of one panel sitting a half-inch below the one before it. After a rain, that panel holds a puddle for two days while everything around it dries. And the concrete on either side looks fine, which somehow makes it worse.
Three questions usually arrive together. Is this the start of a foundation problem? Does the whole sidewalk have to come out? Is this going to run into thousands of dollars?
The reality is more measured. Raising concrete sidewalks is ordinary, well-understood work, and in most cases the slab you already have is the slab you keep. Concrete is strong in compression and perfectly content to sit where it was poured for fifty years, as long as something solid is holding it up. When a panel drops, the concrete usually did not fail. The ground under it did.
Both of the available mistakes cost you. Grind the lip off a slab that is still moving and you buy the same repair again in two years, on concrete that has dropped further in the meantime. Tear out and replace a walk that only needed lifting and you pay several times what the job called for, for new concrete sitting on the same soil that swallowed the old.
This is the procedure in between: how to tell what you are looking at, what you can handle yourself, what a professional lift actually involves, and where the honest answer is that you do not need one.
Sunken or Heaved? Answer That Before You Raise Anything
A sidewalk goes out of level in two opposite ways, and the repairs are opposite too. Sunken means the slab lost support and dropped. Heaved means something underneath pushed it up — usually a tree root thickening year over year, or soil that swells and lifts with frost and moisture. Lifting only applies to the first one. You cannot raise a slab that is already too high.
The confusing part is that both produce the same symptom at the joint: one panel higher than its neighbor. Standing at the lip, you see a step. What tells them apart is the rest of the walk.
- What you see. Sunken: one panel sits low; the walk dips toward it. Heaved: one panel sits high; the walk humps or tents at a joint.
- Water behavior. Sunken: puddles stand on the low panel after rain. Heaved: water runs off; the high edge stays dry.
- Nearby clues. Sunken: a gap opening under the slab edge, soil pulling away, washout at a downspout. Heaved: a mature tree within ten or fifteen feet, a root visible at a joint, damage that appeared over a winter.
- What it means. Sunken: the soil under the slab compacted, eroded, or was never compacted. Heaved: something under the slab gained volume and pushed.
- What fixes it. Sunken: lift the slab and treat the soil that let it drop. Heaved: remove or redirect the cause, then grind, replace the panel, or wait out the season.
If what you have is a heaved panel, stop here. Raising it is not the repair, and a contractor who offers to lift a heaved slab has not looked closely enough. Root-lifted and frost-lifted sidewalks are their own problem with their own answers, and they deserve a longer explanation than this article can give them.
The rest of this one is about the slab that dropped.
Measure the Drop Before You Call Anyone
Nobody should buy a repair for a number they have not measured. A settled sidewalk looks worse in some light than others, and "it seems like it's getting lower" is not something a contractor can quote against or a city can act on. Fifteen minutes with a tape and a straight board gives you a figure, and that figure is what every conversation afterward hangs on.
- Pick the worst joint — the one you trip on or the one holding water — and clear the leaves and grit off both sides so you are measuring concrete, not debris.
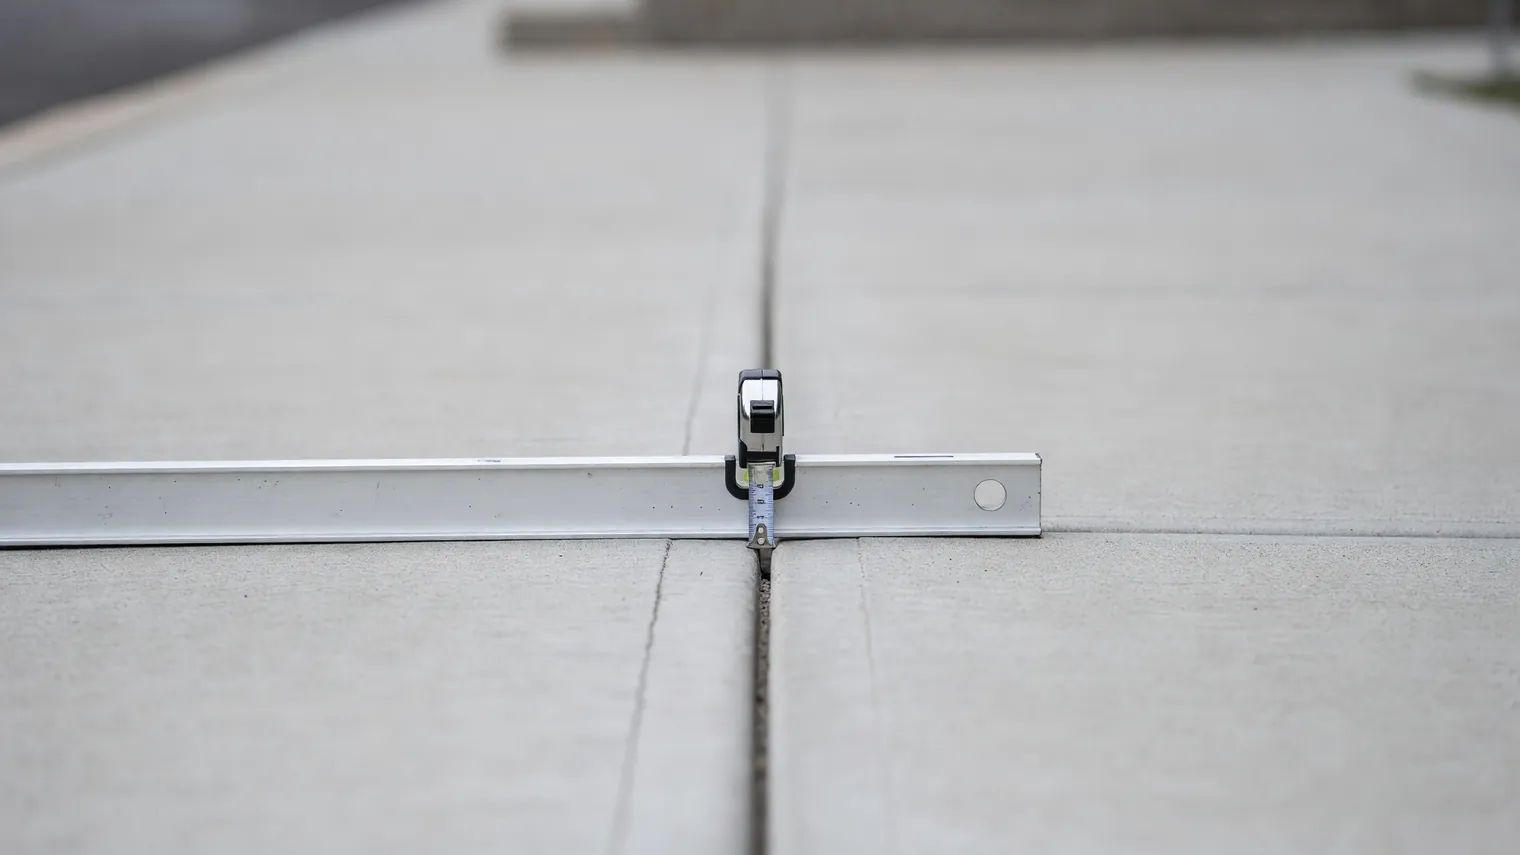
- Lay a four-foot level or a straight board across the joint, resting on the higher panel and overhanging the lower one.
- Measure from the underside of the board down to the low panel at the joint. That distance is your offset. Write it down.
- Walk the board along the length of the sunken panel and measure at both ends. A slab that has tipped will read very differently corner to corner; a slab that dropped straight down reads about the same.
- Run a string line tight from the first sound panel to the last one, a few inches above the surface, and measure down to the concrete every few feet. That tells you how many panels are involved, which is usually more than the one you noticed.
- Look at the joint gaps and the slab edges while you are down there. Note any gap you can see under the concrete, any soil pulled away from the edge, and any downspout or hose bib that discharges within a few feet of the walk.
- Photograph the worst joint with the tape in frame, and date the photo.
Keep the numbers and the photos somewhere you will find them. If the sidewalk is in the public right-of-way, this is the file the city will ask for. If you end up getting estimates, it is the thing that keeps three different contractors quoting on the same problem.
What the Number Actually Means
A lip you can barely feel through a shoe, on a walk that has looked the same since you moved in, is a watch item. Concrete panels settle slightly against each other as they age and as the ground beneath them finds its final density, and a small offset that stopped moving years ago is not a project. It is a thing you measure once a year and forget about in between.
A lip deep enough to catch a toe is a hazard, and it is a hazard whether or not the soil under it is still moving. That distinction matters because it splits the decision in two. The safety problem has a same-week answer. The soil problem has a longer one. You do not have to solve both with the same purchase.
A panel sitting inches low, or a whole run tilting steadily in one direction, is a different animal. Concrete does not compress; it goes down because the material holding it up moved out of the way. An offset that size means there is a void or a soft zone under the slab, and the slab is bridging it until it cannot.
Then there is the question your first measurement cannot answer, which is whether it is still going. Re-measure the same joint the same way in three months, and again after the first hard freeze-and-thaw stretch. A number that has not changed describes a sidewalk that settled and stopped. A number that has grown describes soil that is still losing ground, and that is the case where raising concrete sidewalks without treating what is underneath gets you a second trip hazard in the same spot.
Find Out Who Owns That Sidewalk First
Here's the step almost everyone skips: the walk in front of your house may not be yours to repair. A sidewalk between the curb and your property line usually sits in the public right-of-way, and who pays to fix it is set by local ordinance rather than by where it happens to be. Some municipalities own and repair it outright. Some hold the adjacent property owner responsible for maintenance while still owning the concrete. Many run a cost-share program that splits the bill, and a few will schedule the work themselves once a hazard is reported.
None of that is guessable from the curb, and it varies enough between neighboring towns that a contractor's opinion is not worth much either. One phone call to the public works or engineering department settles it, and that call should happen before you take a single estimate. Spending your own money raising concrete sidewalks that the city was already budgeted to fix is a mistake nobody gets refunded for.
Have your measurement and your photos in front of you, and ask:
- Who is responsible for repairing the sidewalk at this address — the city or the property owner
- Whether there is a repair, replacement, or cost-share program, and what the wait looks like
- Whether reporting the hazard triggers an inspection, and what the inspector measures
- Whether a permit or a right-of-way notice is required if you hire the work out yourself
- Whether an approved-contractor list applies, and what the city accepts as a repair method
- Whether there is already an open complaint or citation on the address
That last one matters more than it sounds. A citation usually comes with a deadline, and a deadline changes which repair makes sense — the fastest legitimate fix and the most thorough one are not always the same week's work.
If the sidewalk turns out to be the city's, you are done. Report it, keep your file, and follow up. If it is yours, you now know what you are allowed to do to it, which is the next question.
Can You Raise a Sunken Sidewalk Yourself?
Partly. A homeowner can remove the trip hazard, and a homeowner can make a shallow offset disappear. What a homeowner generally cannot do is restore the elevation of a slab that is sitting over empty space, because the hard part of that job is not pushing the concrete up. It is controlling where the pressure goes while it happens.
Removing the hazard is real work with a real result, and it is worth taking seriously rather than treating as a consolation prize. A rented concrete grinder will take a small lip down to a bevel in an afternoon. A polymer-modified patching compound, feathered properly over a clean and dampened edge, will ramp a shallow offset so nothing catches. Neither one raises anything, and neither one touches the reason the panel dropped — but on a walk that settled once and stopped, that is not a compromise. That is the correct repair.
Worth Doing Yourself
- Grind or bevel a small lip to kill the trip hazard while you decide about the rest
- Ramp a shallow offset with a patching compound rated for exterior traffic
- Pull and repour one small square that is already broken into pieces
- Fix the downspout or grading that is soaking the soil at the slab edge
- Re-measure and document before and after whatever you do
Not Worth Attempting
- Prying, jacking, or wedging a slab upward from the edge — concrete has almost no strength in bending and will crack before it hinges
- Pouring a thin feather of ordinary concrete over the low panel; it debonds and comes up in sheets by spring
- Washing sand or gravel slurry into the gap under a slab and expecting it to compact or stay put
- Buying a consumer lifting kit expecting it to reach a deep void
- Any of it on concrete that turns out to belong to the city
Consumer polyurethane kits are a fair question and they deserve a straight answer rather than a sneer. They work the way the professional material works, and on the small end of the range — a shallow, well-defined void under a single panel, a lift measured in fractions of an inch — people do get results with them. The limits are volume, depth, and control. The kits carry enough material for a small void rather than a soft zone several feet down, they inject at one rate through one port at a time, and they give you no way to watch the slab move and stop at the right moment. Injecting more where it is already tight is how a panel cracks, and once it is cracked, there is no undoing that with another cartridge.
So the honest line is this. A stable quarter-inch lip on a walk that has not moved in years does not need Stratalock, and it does not really need a contractor. Grind it, or ramp it, and go do something else with your weekend. It is the slab that is still dropping, or the one sitting inches low over ground that gave way, where the work stops being a weekend project and the soil becomes the thing that has to be fixed.
Raising Concrete Sidewalks: The Four Methods, Compared
Four methods show up on estimates for raising concrete sidewalks, and all four are legitimate work done by legitimate contractors. Estimates may call it sidewalk leveling, concrete lifting, or slab raising; the label tells you less than the method does. What separates them is not quality. It is which of two questions each one answers: does it put the surface back where it belongs, and does it do anything about the ground that let the surface leave.
- Grinding or ramping. Restores elevation: no — it removes the lip and leaves the slab low. Treats the soil: no. What it involves: grinding the high edge down, or feathering a patch across the offset.
- Mudjacking. Restores elevation: yes. Treats the soil: no — it adds load to it. What it involves: pumping a cement slurry of roughly 100 lbs per cubic foot through holes typically one to two inches across.
- Polymer injection. Restores elevation: yes. Treats the soil: yes, in the same step. What it involves: injecting high-density expanding structural polymer, roughly 2 to 4 lbs per cubic foot, through 3/8-inch ports.
- Replacement. Restores elevation: yes. Treats the soil: only if the subgrade is corrected first. What it involves: breaking out the panels, hauling the debris, preparing the base, forming and pouring new concrete.
Split that list down the middle and you have the real decision. Grinding and mudjacking and replacement all leave the subgrade essentially as they found it. Grinding accepts the low slab and just makes it safe, which is a perfectly good trade when nothing is moving. Mudjacking genuinely raises the slab, and it has raised a great many of them, but the material doing the lifting is heavy, and weight is what soft soil is already failing to carry. Replacement gives you new concrete on the old base unless somebody explicitly fixes the base, which is why a replaced sidewalk over untreated soil can settle again on the same schedule as the first one.
Polymer injection is in the other group by itself, because the material that raises the slab is the same material that goes into the soil. Expanding polymer fills the voids, compacts the loose soil around them, and increases the ground's load-bearing capacity, and the slab comes up as a result of that rather than alongside it. The polymer is hydrophobic, so it works in the wet conditions that usually caused the problem, and it will not shrink, degrade, or wash away — it becomes a permanent part of the soil mass. That is the whole argument for treating the soil rather than the surface, and it is also the reason the lift and the stabilization cannot be bought separately.
None of which makes the other three wrong. It makes them answers to a different question, and the question you are actually asking depends entirely on why the panel went down.
Why the Sidewalk Sank in the First Place
The slab is the symptom. The subgrade is what failed. That argument runs through everything Stratalock publishes, and it gets a longer treatment in our articles on what cracked sidewalks are telling you and on settled slabs across a property. Here it only needs to be long enough to sort your own situation into the right pile.
The usual causes, under residential flatwork:
- Backfill that was never properly compacted when the walk was poured
- A utility trench cut across or beside the walk and backfilled loosely afterward
- Downspout or sump discharge landing at the slab edge, year after year
- A leaking irrigation line or service line washing the fine material out from under the concrete
- Erosion along an unsupported edge where the grade falls away
- Organic material or construction debris buried in the base, slowly losing volume as it breaks down
- Clay that shrinks hard in a dry summer and does not come all the way back
- Freeze and thaw cycling that loosens the soil column and lets it redistribute
- A heavy vehicle crossing a walk that was poured for foot traffic
The first two and the last one are events. They happened, the slab found its new position, and if nothing else is acting on the soil the movement stops — which is exactly the sidewalk you can grind flush and forget. The middle of that list is different. Water moving through soil does not finish; it keeps carrying material away as long as it keeps arriving, and voids opened that way grow. Decomposing fill and seasonal clay behave the same way, on a slower clock.
So the useful question is not what caused it. It is whether the cause is over. That is what your second measurement, three months later, is really telling you, and it decides whether raising concrete sidewalks is a one-time repair for you or the first half of one.
What a Polymer Lift Day Actually Looks Like
For a walk that is still going down, raising concrete sidewalks runs in this order. It is less dramatic than most people expect, and a good deal shorter.
- We test the soil before we plan anything. Dynamic cone penetrometer testing measures soil density beneath the slab and finds the weak zones — where they start, how deep they run, and how far past the visible dip they extend. This is the step that turns a guess about a void into a map of one.
- We build a custom injection plan from what the testing found. The plan sets the depths and the locations, which is why two sidewalks with the same half-inch lip can get very different treatments. Ports get laid out on a spacing that suits the slab and the void, not on a habit.
- We drill 3/8-inch injection ports through the concrete. They are about the diameter of a pencil, and they are the entire footprint of the work on your sidewalk.
- We inject high-density expanding structural polymer into the weak subgrade. The material goes to the predetermined depths rather than being dumped under the slab. As it expands it fills the voids, compacts the loose soil around them, and increases the load-bearing capacity of the ground.
- The slab comes up as the soil firms. Lift is monitored in real time, panel by panel, and the injection stops when the surface reaches level. Stabilizing and lifting are the same operation here, not two visits.
- The polymer cures fast. It reaches 90% of its full compression strength within fifteen minutes, which is why the walk is not out of service for days.
- We patch the ports and inspect the finished surface. The offset you measured at the start is the thing that gets re-measured at the end.
Most concrete lifting jobs are finished in a few hours, and most residential projects are completed in a single day. No excavation, no forms, no waiting on a pour to cure, and no strip of bare dirt where your landscaping used to be. The same process at a much larger scale is what goes underneath a settling foundation, where it runs 40 to 70 percent less than traditional pier systems — a sidewalk is the small, quick version of work that is engineered for a house.
How Much Lift Is Realistic — and What Can't Be Raised
A lift moves the slab back toward level, and on a sound panel over a well-mapped void that generally means back to flush with its neighbors. What it does not do is turn old concrete into new concrete, and there are situations where the honest recommendation is to stop talking about lifting.
A panel already broken into several pieces is the clearest one. Each fragment wants to ride its own part of the expanding soil, and what comes up is several pieces at slightly different planes rather than one surface. Concrete that is spalling, crumbling at the edges, or shot through with a web of cracks has the same problem for a different reason: there is not enough intact slab left to carry the load evenly. Both of those are replacement jobs, and a contractor who tells you so is doing you a favor rather than losing a sale.
Heave is the second one, and it is worth repeating because it gets misdiagnosed in both directions. A slab pushed up by a root or by expanding soil is already too high. There is nothing to raise.
The third is geometry. A sidewalk that has to meet a fixed edge — a porch step, a driveway apron, a curb, a door threshold — can only come up as far as that edge allows, and a walk that was poured out of level to begin with will come back to the elevation it actually had, not the one it should have had. That is worth establishing before the work rather than after, with the same tape measure you started with.
Stratalock does not publish a maximum lift height for residential flatwork, and you should be skeptical of anyone who quotes one off the top of their head without testing the soil first. The realistic answer comes from the penetrometer results and the condition of the concrete, which is why the assessment comes before the number.
A Sunken Patio in Chicago, and What It Took to Bring It Back
This one was a patio rather than a sidewalk, which is worth saying plainly. It is also the closest published example of what a day like this looks like on residential flatwork, and the slab, the soil and the method were the same.
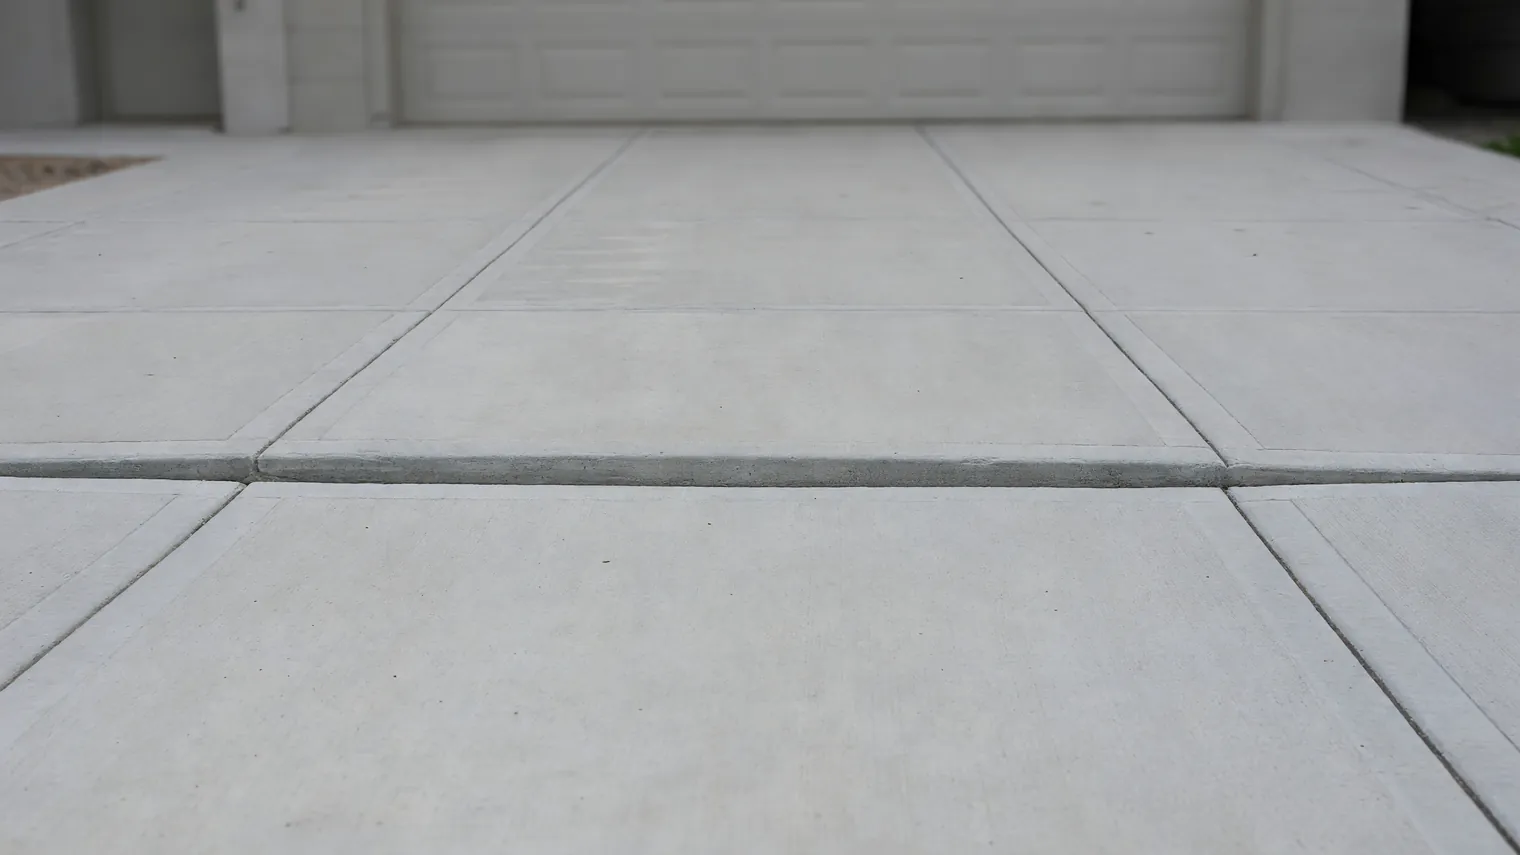
A homeowner in Chicago had rear patio slabs sitting three inches low, pulled away from the house and forming a trip hazard right at the back door. The cause was weak soil, and what kept making it weaker was water — poor drainage that let rain pool against the patio after every storm. Three inches is the kind of number people assume means demolition.
It did not. Stratalock developed a targeted injection plan using specially formulated geotechnical polymer, lifted the slab back to level, and compacted the weak soil underneath it in the same pass. Start to finish, the project took less than four hours.
The part of that day worth copying is what happened alongside the lift: downspouts were added to redirect water away from the patio. Without that, the soil that had been washing out for years would have gone on washing out under a freshly leveled slab. The lift bought back the elevation; the drainage change is what protects it. On your sidewalk, the equivalent is usually a downspout extension or a regraded few feet of lawn, and it is not an upsell. It is the half of the repair that keeps the other half.
Keeping It Level After the Lift
Almost everything that protects a raised sidewalk is water management. Soil under concrete fails when water keeps arriving and keeps leaving with a little of the soil each time, so the maintenance list is short and mostly about where the water goes.
- Extend downspouts past the walk, not to the edge of it
- Check that the grade beside the sidewalk falls away from the concrete
- Seal the joints and the slab edges so water cannot track down the side
- Watch for irrigation heads spraying the walk and for wet ground that never dries
- Clear debris out of the joints so water runs off instead of sitting in them
- Keep delivery trucks and dumpsters off flatwork poured for foot traffic
- Re-measure the offset after the first heavy rain, and again after the first freeze-and-thaw season
That last line is the one people skip, and it is the cheapest insurance on the list. Two minutes with the same board and tape, twice a year, tells you whether the repair held. A number that stays put means the soil is carrying the slab. A number that starts moving again means something is still feeding water into the ground, and finding it now is much less expensive than raising concrete sidewalks a second time.
A Sunken Sidewalk Can Be Raised — the Question Is Whether the Soil Comes Up With It
Almost every sunken sidewalk can be brought back to level. That was never really in doubt. What decides whether it stays there is what happens to the ground while the slab is moving.
So take the two branches honestly. If the offset is small, the walk has not changed in years, and the concrete is sound, you are looking at a grind, a patch, or a phone call to the city — and possibly nothing at all. That is a real answer, not a runner-up, and it is the right one more often than a contractor's website usually admits. If the panel is inches low, still dropping between measurements, or sitting over soil that a downspout has been washing out for a decade, then raising concrete sidewalks without treating that soil is a repair with an expiration date on it.
Measure first. Find out who owns the walk. Then decide which of those two sidewalks you have.
If it turns out to be the second one, our process walks through how the testing, the injection plan, and the lift actually run, and you can ask for a free on-site assessment — a geotechnical expert looks at the slab, tests what is under it, and tells you what it needs, including when the answer is that it does not need us. You can also reach us at (855) 850-5625 or hello@stratalockusa.com.
Get a free assessment and cost comparison for your foundation project. Discover exactly how much you can save with deep soil injection technology.