
How to Repair a Foundation: A Complete Guide
Every foundation repair treats one of three things: the concrete, the water, or the soil. Here is how to tell which one you have, which repairs you can make yourself, and what each professional method actually fixes, so you pay for the repair your house needs and nothing more.
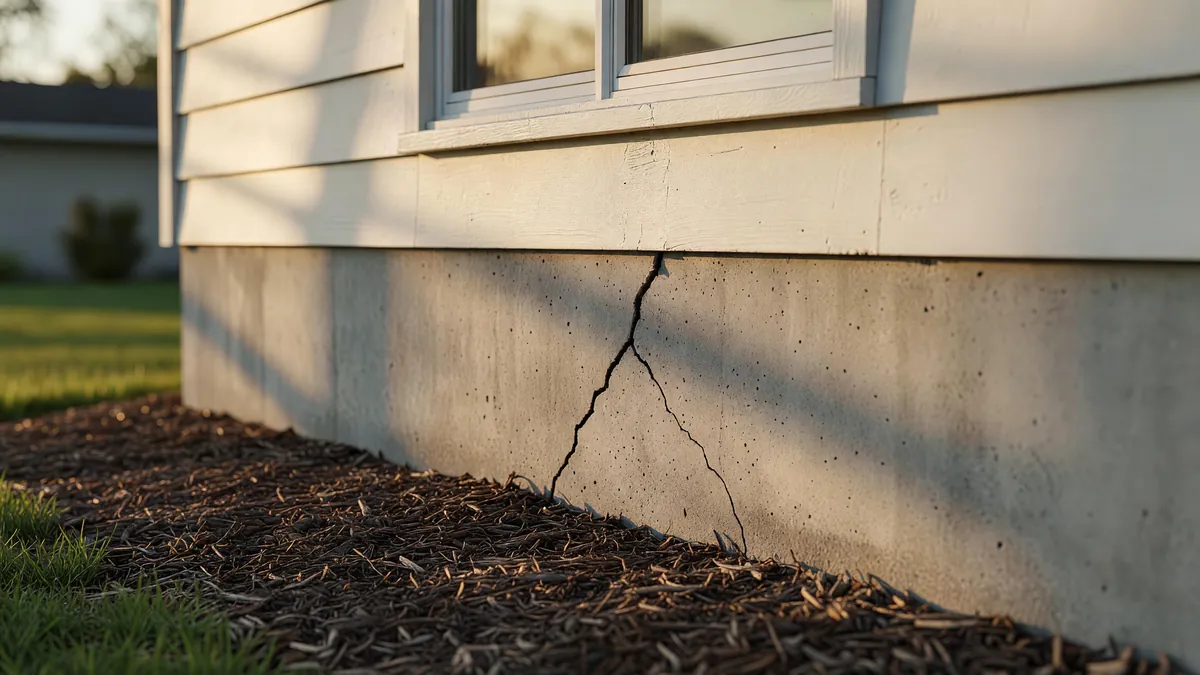
You notice it on a Saturday morning. The bedroom door that always closed with a soft click now catches on the frame. You lean on it, and it sticks. Later, in the basement, you find a crack running down the concrete wall that you're fairly sure wasn't there last year. Upstairs, there may be a matching line in the drywall.
Then the questions start. Is your foundation failing? Are you about to spend a fortune? Do you need to work out how to repair a foundation yourself, or is this something you shouldn't touch?
The reality is more measured. Most foundations that show these signs are not failing. Many of the cracks you'll find in a basement come from concrete doing what concrete does as it cures, shrinks, and ages. Some of them are a weekend job with a tube of sealant. Others are the visible edge of a soil problem several feet below grade, and no amount of patching will reach it.
Knowing how to repair a foundation comes down to knowing which kind of problem you have. Getting it wrong costs you either way. Overreact to a cosmetic crack and you can pay for a repair your house never needed. Seal over a crack that's still moving and you've hidden the warning sign while the soil underneath keeps settling.
This guide covers both sides: the repairs you can handle yourself, the signs that mean the soil needs attention, and every professional foundation repair method in plain terms, including what each one actually fixes and what it leaves in place.
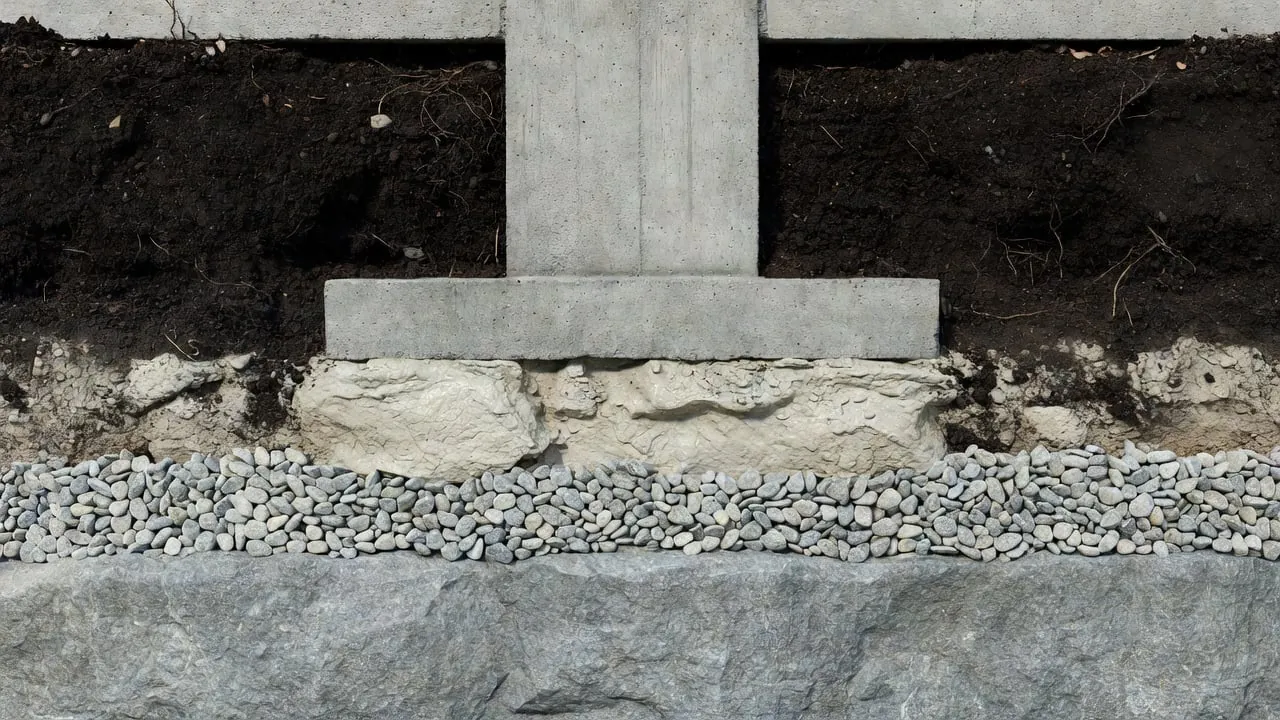
How to Repair a Foundation Starts With the Cause, Not the Crack
Every foundation repair, from a tube of sealant to a full pier installation, is aimed at one of three things. Before you choose a method, it helps to know which one you're actually trying to fix.
- The concrete. Sealants, epoxy, and patching close a crack and keep water out. They don't change why the crack formed.
- The water. Gutters, downspouts, and grading control how much moisture reaches the soil around your foundation. They remove the conditions that drive movement, but they don't restore soil that has already lost its strength.
- The soil. Piers, slab lifting, and deep soil injection deal with the ground that's supposed to be holding your house up. They carry the load past it, raise what sits on it, or strengthen it in place.
Here's what most homeowners don't realize: the crack you can see sits at the top of that chain, and the soil sits at the bottom. A crack from concrete shrinkage is a concrete problem, and sealing it is a complete repair. A crack from settlement is a soil problem that happens to show up in the concrete. Seal it, and the crack disappears. The settlement doesn't.
That's why a foundation repair so often has to be done twice. The first fix matched the symptom instead of the cause. If you're not sure what's driving the movement under your house, it's worth reading up on the most common causes of foundation problems before you spend anything.
Read the Symptoms Before You Choose a Repair
The first step in how to repair a foundation happens before anyone tests the soil: reading what your house is already telling you. The trick is to read the signs as a set rather than fixating on the one that worried you first. A single crack says very little on its own. A crack, plus a door that sticks, plus a floor that slopes toward the same corner, says a great deal.
These are the signs homeowners most often find:
- Thin vertical cracks in a poured basement wall
- Random, web-like cracks in a basement floor slab
- Flaking or scaling on the concrete surface
- Cracks that grow wider or longer over months
- Stair-step cracks running through brick or block
- Sloping floors, sticking doors and windows, gaps opening at trim
- Basement walls that bow or lean inward, often along a horizontal crack
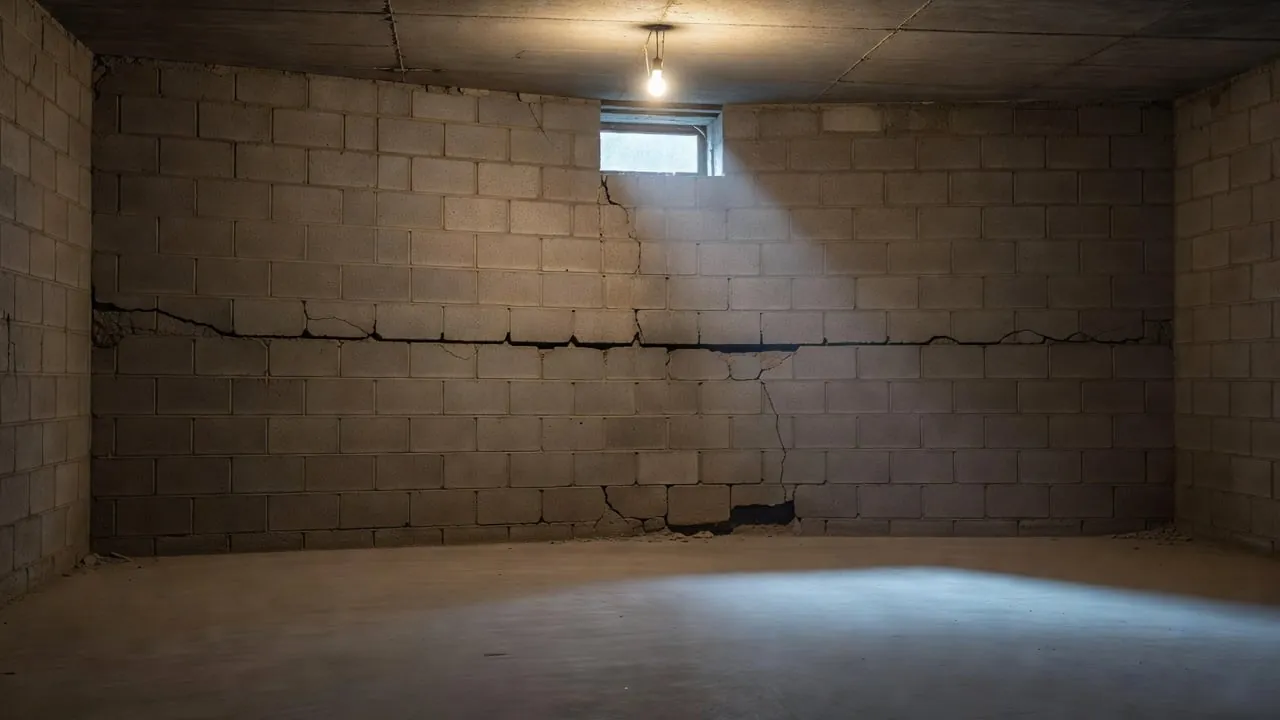
The first three are concrete behaviors. Concrete shrinks as it cures and moves slightly with temperature and moisture, and those cracks usually form once and stay put. They call for sealing, not soil work. The next three trace back to the soil, and those are the signs that tend to keep moving. When cracks widen, step through masonry, or show up alongside a door that no longer closes, the house itself has moved, because the ground under part of it has settled. The last sign is a separate problem. A bowing wall is being pushed sideways by soil pressure from outside rather than sinking into weak soil below, and it calls for a different repair.
Cracks: Width, Direction, and Whether They Move
Three things about a crack matter more than how alarming it looks: how wide it is, which way it runs, and whether it's still moving.
Start with width. A common rule of thumb treats a crack about 1/8 inch wide or less as hairline, and most hairline cracks in a foundation are shrinkage that formed once and stopped. A crack wider than about a quarter inch deserves a closer look, especially if one side sits higher than the other. That offset means the concrete on one side has dropped.
Direction comes next. Vertical or slightly diagonal cracks in a poured wall are the most common and usually the least concerning. Stair-step cracks follow the mortar joints in brick or block, and they tend to form when one part of the wall settles more than its neighbor. Horizontal cracks are a different problem. They usually mean soil pressure is pushing the wall inward, which gets its own section below.
But here's what's also true: width and direction tell you what kind of crack you have. Movement tells you whether it's a problem. A wide crack that hasn't changed in ten years is a record of something that already happened. A hairline crack that grew last spring is still happening.
Finding out costs almost nothing. Draw a pencil line across each end of the crack and write the date beside it. Photograph it with a tape measure held against it for scale. Check again every month or two, and after heavy rain or a hard freeze.
The test that matters: if the crack stays inside your marks from one summer to the next, seal it and move on. If it grows past them, the soil is still moving, and sealing alone won't hold.
Floors, Doors, and Gaps That Point to Settlement
Floors, doors, and trim are better evidence than any single crack. Concrete can crack without moving anywhere. A door frame can't go out of square unless the structure around it has moved.
A settling foundation doesn't move evenly. When one part settles more than the rest, the framing above it gets pulled along. Floors slope toward the low corner. Door and window frames rack slightly, so a door that used to swing freely now catches at the top of the latch side. Gaps open where baseboards meet the floor or where crown molding meets the ceiling. These signs usually show up in the same part of the house, all on the side where the soil gave way. If you're seeing more than one of them, the guide to sagging floors and what causes them goes into how to trace the slope.
But don't jump to conclusions. Wood swells in humid months, so a door that sticks every summer and frees up every winter is usually moisture in the frame, not settlement. Most older homes also have a little slope that hasn't changed in decades.
What to look for: a sign that's new or getting worse, especially when it sits in the same area as a crack that's still growing.
Walls That Bow or Lean Inward
A basement wall that bows inward is responding to a different force. Settlement is the soil underneath losing its strength, so part of the house drops. A bowing wall is the soil outside pushing in. The ground behind a basement wall presses sideways on it all the time. When that soil gets saturated after heavy rain, swells, or freezes, the pressure climbs, and a wall that held for years can start to give.
The signs are fairly specific. A horizontal crack runs along the wall, often somewhere near mid-height. In a block wall, the mortar joints may open in a long horizontal line, or in a stair-step pattern that bulges toward you. Hold a level or a taut string against the wall and the middle sits closer to the room than the top and bottom.
Treat this one with more care than a settling corner. Mark the crack and measure the bow the same way you'd track any other crack. But if a wall is moving inward, it's worth having it looked at sooner rather than waiting out a full year of seasons. The fix is also different. The force is coming from the side, so the repair has to hold the wall against it, and the water behind the wall usually needs attention too.
Foundation Repairs You Can Do Yourself
Plenty of people searching for how to repair a foundation turn out to have one of two problems, and both are squarely homeowner jobs. Neither needs a contractor. The first is a stable crack, one that hasn't grown past your pencil marks in a year of watching. The second is water that collects against the house because the gutters overflow, the downspouts empty at the wall, or the ground slopes the wrong way.
For a stable crack, sealing it is a complete repair. You aren't covering up a warning sign. You're keeping water out of concrete that has already finished moving. For drainage, the fix is often the whole repair. Dry, consistent soil is much less likely to start settling.
The honest version: if your signs fall into those two groups, you probably don't need us. You need a free afternoon and a few supplies from the hardware store.
How to Seal a Stable Foundation Crack
Most foundation crack repair you can do yourself is this one job, and it starts with patience. Be sure the crack has earned a seal: it should have held still through every season of the past year. Sealing a crack that's still moving only hides the next one.
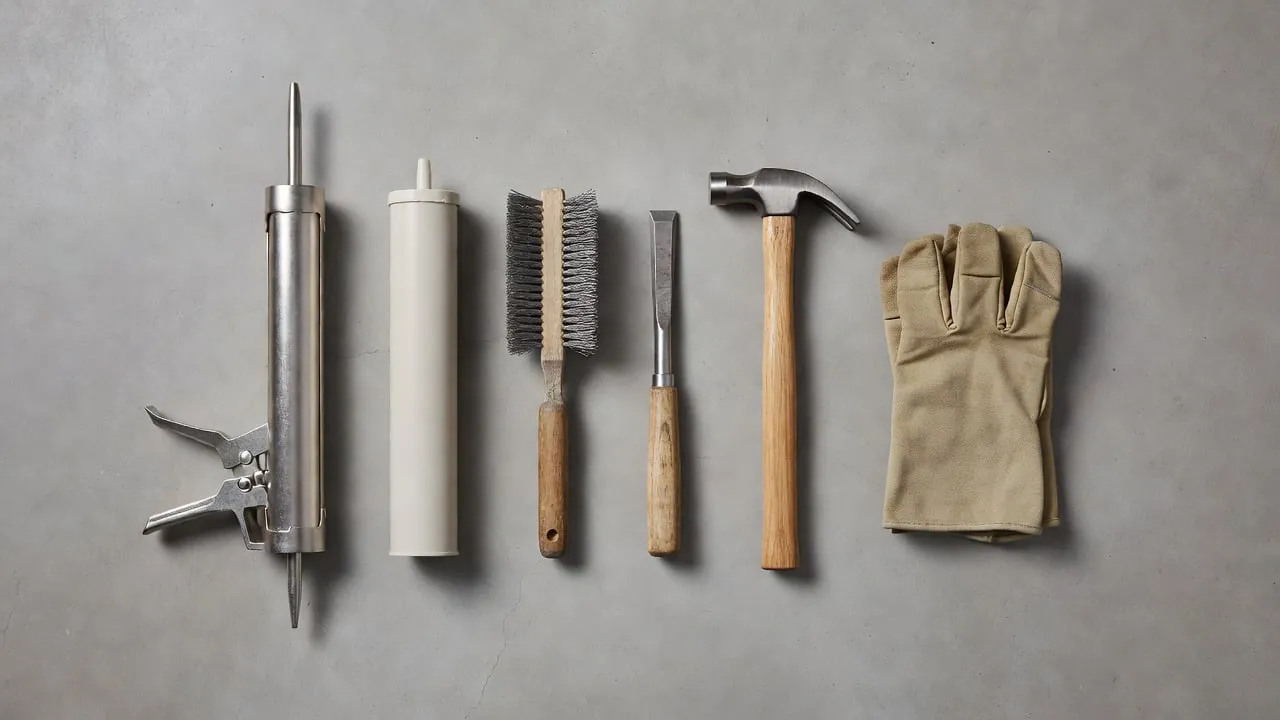
- Confirm it's stable. Check your dated marks and photos one last time. If the crack has grown, offset, or widened past them, stop here and read the next section instead.
- Clean it out. Use a wire brush and a shop vacuum to clear loose concrete, dust, old caulk, and efflorescence, the white mineral crust that water leaves behind. Sealant won't bond to crumbs.
- Widen the surface if you need to. If the crack is too fine to take sealant, use a chisel or a grinder to cut a shallow V-groove along it. That gives the material something to grip.
- Choose the material for the job. A flexible urethane sealant handles most surface cracks in floors and walls. A polyurethane injection kit fills a poured wall through its full thickness and stays flexible, which helps where water comes through. An epoxy injection kit bonds the two sides back together rigidly, so save it for cracks you're sure have stopped moving. If water is actively seeping through, hydraulic cement sets fast enough to plug it.
- Apply it. Follow the kit's directions. Injection kits use ports along the crack and a surface paste to hold the material in. Fill from the bottom up so the material pushes air out ahead of it.
- Let it cure. Give it the full cure time on the label before you paint, cover, or test it with water.
- Keep watching. Draw new pencil marks at each end of the sealed line. A seal that cracks open again is telling you the concrete is still moving.
Fix the Water First
Water is the most common reason the soil under a house changes, and fixing it costs less than anything else in this guide. Soil that gets soaked and then dries out swells and shrinks with each cycle. Saturated soil can also wash out or lose strength under a footing. If you keep the ground around your foundation evenly moist and draining away, you remove one of the main conditions behind settlement.
Walk around the outside of the house during a heavy rain. That's when drainage problems are easiest to see:
- Gutters that overflow, sag, or are packed with leaves. Clean them, and rehang any that pull away from the house.
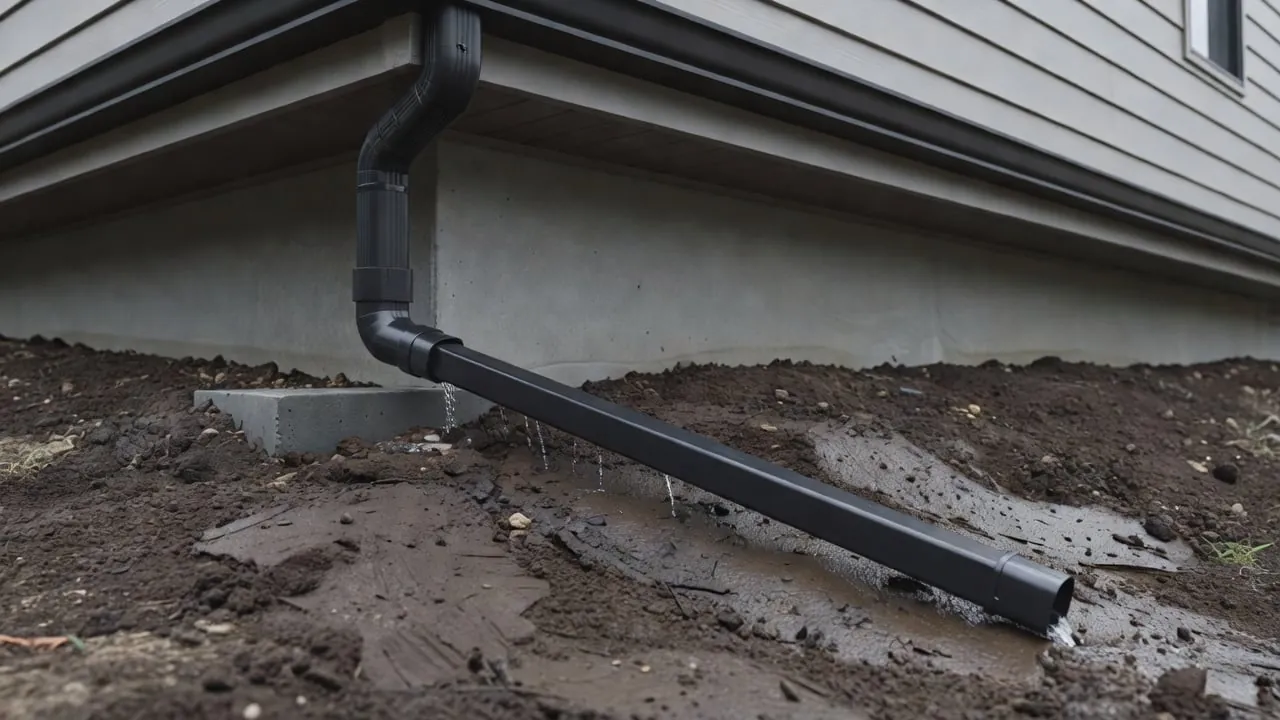
- Downspouts that empty right at the foundation wall. Add extensions or splash blocks to carry the water well away.
- Grading that slopes toward the wall, or low spots where puddles sit after a storm. Build the soil up so it falls away from the foundation on every side.
- Plumbing leaks, such as a dripping hose bib, a cracked irrigation line, or a sprinkler head aimed at the wall. Fix them, and keep watering clear of the foundation.
Do these in order: water first, sealing second. Once the ground stays drier, keep checking the cracks you've been tracking. If they hold steady, the drainage work may have been the whole repair. If they keep moving after the water is under control, the soil has already lost strength. That's where the next section picks up.
When Foundation Repair Needs a Professional
Some signs are past the point of sealant and gutter extensions. When any of these show up, the next step is a professional assessment:
- A crack that grows past your pencil marks, or reopens after you've sealed it
- A horizontal crack in a basement wall, or a wall that bows inward
- A crack wider than about a quarter inch, especially with one side sitting higher than the other
- Floors that slope more than they used to, in the same area as a crack that's still growing
- Doors and windows that keep sticking through dry months as well as humid ones
Each of these means something is still moving. The concrete is reporting it, but the concrete isn't the cause. Fixing the water around your house may slow the movement down. If the soil has already lost strength, though, drier ground won't restore it.
What separates a useful assessment from a sales visit is whether anyone looks underneath. A walk-through with a level and a flashlight can confirm that your house has moved. It can't tell you why. A proper evaluation measures the soil itself. We use dynamic cone penetrometer testing to find how deep the weak soil goes and where it starts, because a repair aimed at the wrong depth repeats the first mistake at a higher price. The guide to what a foundation evaluation should include explains what to expect and what to ask.
A fair test of any contractor: ask what caused the movement and how they know. If the answer is a repair method before it's a diagnosis, keep asking questions.
Professional Foundation Repair Methods, Compared
Once a problem is past sealant and drainage, how to repair a foundation becomes a question of matching the method to the cause. Professional foundation repair methods don't compete for the same job. A pier, a wall anchor, and a polymer injection each answer a different problem, so the right one depends on what your assessment found: soil that settled under a footing, soil pressing sideways on a wall, or a slab that dropped into a void.
For each method below, the part that matters most is what it leaves in place. A method can work exactly as designed and still leave the original cause under your house.
Steel and Helical Piers
Piers are the most established way to repair a foundation that has settled, and they work. Steel push piers are driven down beside the footing until they reach deeper, stable ground or bedrock. Helical piers are screwed into the soil like large augers until they reach the load they're designed to carry. Either way, brackets attach the pier to the footing, and the weight of the house moves off the weak soil and onto the piers. Where the stable layer sits far below grade, that's a sound engineering answer.
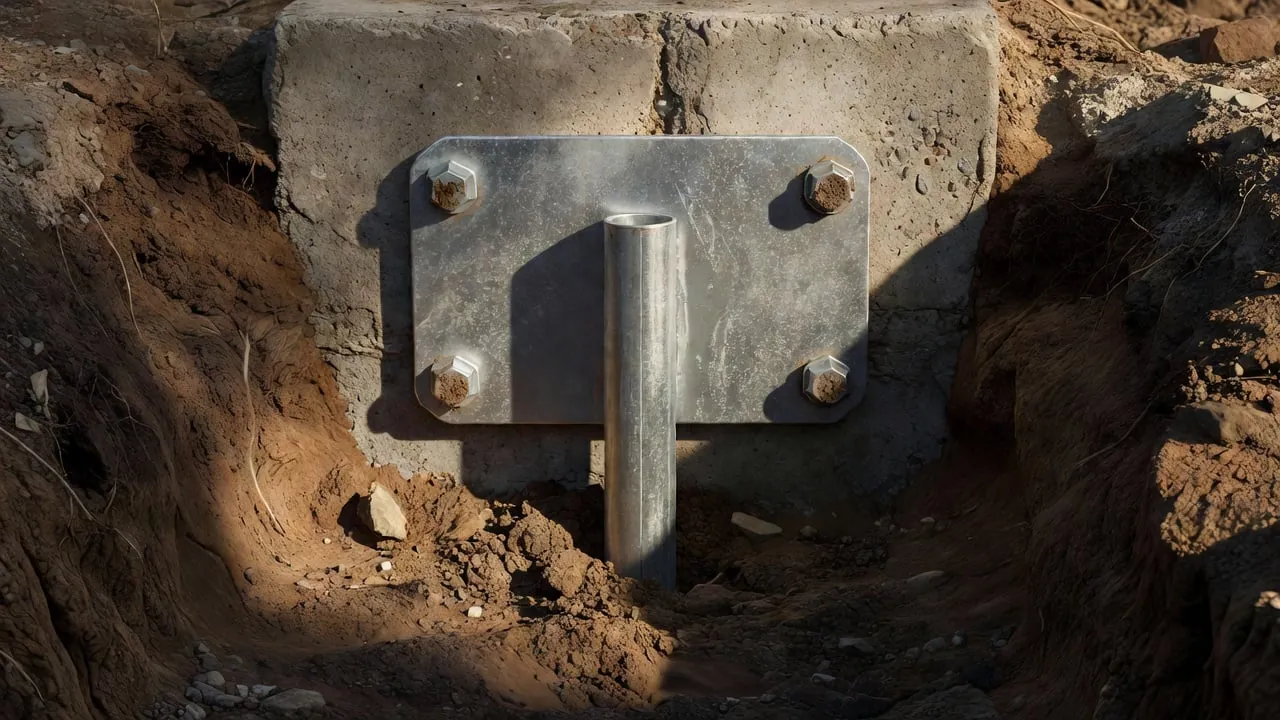
What piers do is bypass the problem soil. They don't change it. The weak layer that let your house settle stays where it was, and the piers carry the load past it. Installing them also means digging. Installers excavate beside the foundation at each pier location, which disturbs landscaping, walkways, and sometimes interior floors, and the job typically takes heavy equipment and more days on site. That's a large part of why traditional pier systems cost more than treating the soil directly.
The fair summary: piers work by moving the load to deeper ground. You pay for that in excavation and cost, and the soil that caused the settlement is still under the house.
Wall Anchors, Bracing, and Carbon Fiber
Wall anchors, bracing, and carbon fiber solve a different problem from piers. They don't hold a house up. They hold a basement wall in place against the soil pushing on it from outside.
- Wall anchors use a steel plate on the inside of the wall, connected by a rod to an anchor set in stable soil out in the yard. Tightening the rod holds the wall, and over time it can draw the wall back toward plumb.
- Steel braces are vertical beams bolted to the basement floor and to the framing above. They keep the wall from moving any farther inward.
- Carbon fiber straps are bonded to the wall with epoxy. They add stiffness and resist further bowing, but they don't pull the wall back.
To be clear, deep soil injection under the footing is not a wall-bracing method. It strengthens weak soil beneath a foundation so the foundation stops settling. It does nothing to counter soil pressing sideways on a wall. If your wall is bowing, one of these methods is the right tool, usually paired with better drainage behind the wall so the pressure doesn't keep building.
Slab Lifting Without Stabilizing
Slab lifting raises concrete that has dropped back toward level. A contractor drills holes through the slab and pumps material underneath. Depending on the method, that's a cement-based grout or an expanding polymer, and it fills the gap and pushes the slab up. For a sunken garage floor, patio, or interior slab, the results show right away. Floors level out, trip edges disappear, and doors may swing freely again. The guide to foundation lifting covers how each approach works in more detail.
Here's the critical thing about lifting: raising the concrete doesn't change the ground it sits on. If the slab dropped because a void washed out under it, filling that void may be all it needs. If it dropped because the soil several feet down is loose or weak, that soil is still there under the newly level slab. The lift holds until the ground gives way again.
The question to ask: what's under the slab after the lift, and how deep does the treatment go? Material placed just under the concrete raises the slab. Treating the soil below it is what keeps the slab from sinking again.
Deep Soil Injection
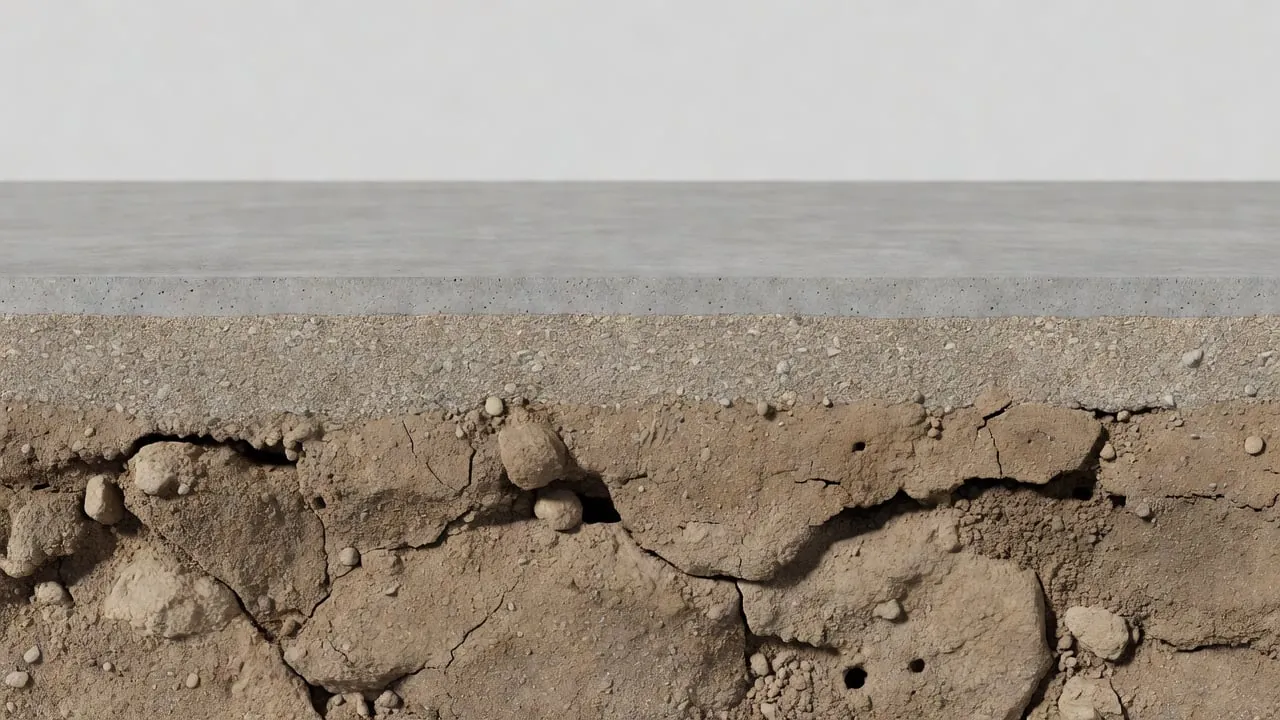
Deep soil injection works on the layer the other methods go around or over. Small injection probes are driven to predetermined depths beneath the foundation, and a high-density expanding structural polymer is injected into the weak subgrade. As it expands, the polymer fills voids, compacts loose soil, and increases the soil's load-bearing capacity. That same expansion lifts the foundation back toward level, with lift levels monitored in real time, so stabilizing and lifting happen in one step.
Because everything goes in through small probes, there's no digging beside the footing and no heavy equipment in the yard. Most residential projects are completed in a single day. The polymer won't shrink, degrade, or wash away. It becomes a permanent part of the soil mass under your house. The residential soil stabilization page shows where it fits for a home.
It isn't the answer to every problem. It's built for settlement, where weak soil below the footing let part of the house drop, and it only works as well as the testing that finds where that soil is.
The fair summary: deep soil injection strengthens the ground itself, so the soil that caused the settlement doesn't stay weak after the repair.
Foundation Replacement
Foundation replacement means removing the old foundation and pouring a new one. The house is lifted and supported while the work happens, and it is the largest job in foundation repair. Sometimes it's the right answer. A foundation can fail structurally because the concrete has crumbled, the wall has broken apart, or an old stone or block foundation has deteriorated past saving. In those cases, nothing short of new concrete will carry the house. The guide to when foundation replacement is actually needed covers how to recognize that point.
Settlement is a different case. When a sound foundation drops because the soil under it gave way, the concrete isn't what failed. If you replace it, you get a new foundation sitting on the same weak soil.
The fair summary: replace a foundation that has failed as a structure. If it has only moved, treat what's underneath it.
How Deep Soil Injection Repairs a Foundation, Step by Step
Every step in a deep soil injection repair depends on the first one. If the polymer goes in at the wrong depth, it can lift the house without treating the soil that let it drop. Here is the full sequence, in order:
- Test the soil. We measure soil density with dynamic cone penetrometer testing at points across the affected area. The readings show where the soil is weak, how deep that weak layer starts, and how far down it runs. That's the difference between seeing that a house settled and knowing what let it settle.
- Build a custom injection plan. The plan sets where each injection point goes and how deep it reaches. It's based on what the testing found under your house, not a standard spacing used on every job.
- Drive the injection probes. Small injection probes go into the ground to those predetermined depths beneath the foundation. Nobody digs beside the footing, and your landscaping stays where it is.
- Inject the polymer. High-density expanding structural polymer is pumped through the probes into the weak subgrade. As it expands, it fills voids, compacts the loose soil around it, and increases the soil's load-bearing capacity.
- Monitor the lift. As the soil firms up, that same expansion pushes the foundation back toward level. We watch lift levels in real time and adjust as we go, so the foundation rises evenly and no corner goes past level.
- Inspect and patch. A final inspection confirms that the foundation is properly supported and the soil has reached the stability the plan called for. Then the probes come out and the small probe holes are patched.
Most residential projects are completed in a single day, with no open trenches and no need to move out. The overview of our process lays out the same steps with more detail on what happens on site.
What a Real Repair Looks Like: A Settling Home in Denver
A 1950s brick home in Denver had started to settle. Foundation settlement is common in that part of Denver. What mattered was what was causing it at this particular house.
Testing answered that before anyone planned a repair. We ran soil density tests with a Pagani dynamic cone penetrometer, and they found weak, poorly compacted soil reaching about 10 feet below grade. That soil could no longer support the brick foundation sitting on it.
The injection plan came from those readings. We placed injection points 4 feet on-center along the affected area and injected each point at two depths. That way the polymer reached the whole column of weak soil, not just the layer right under the footing. A single shallow pass could have lifted the foundation and still left most of the weak soil untreated.
The full stabilization took four hours. Nobody dug beside the footing, and the homeowners didn't have to change their routine while the work went on. The Denver case study has the full write-up.
What to take from it: the four hours wasn't the hard part. The repair worked because the testing first found the weak soil 10 feet down, and the plan was built to reach it.
What Foundation Repair Costs, Compared
Foundation repair costs split the same way the methods do. Repairs to the concrete and the water are inexpensive. Repairs to the soil cost more, and the range between the cheapest and most expensive option is wide.
- Sealing a stable crack: a tube of sealant or an injection kit, plus an afternoon of your time.
- Fixing drainage: cleaned gutters, downspout extensions, and some fill soil for grading. Usually the least expensive repair in this guide, and sometimes the only one you need.
- Deep soil injection: a professional job that runs 40–70% less than traditional pier systems. Much of that difference comes from skipping excavation and the days of site work that come with it.
- Steel and helical piers: more digging, heavier equipment, more days on site, and a higher cost.
- Foundation replacement: the largest job in foundation repair. It's reserved for a foundation that has failed as a structure.
The figure that matters most won't show up on any quote: the cost of repairing a foundation twice. If you seal a crack over active settlement or lift a slab on soil that's still weak, you pay for that first repair and then for the one that deals with the cause. The cheapest repair is the one that matches what's actually moving. If that's a stable crack, seal it and keep your money. For a closer look at why treating the soil costs less than piers, see the breakdown of how deep soil injection saves 40–70 percent.
How to Keep a Repaired Foundation From Moving Again
A repair fixes the soil or the concrete as it is on the day the work is done. Keeping it fixed depends mostly on what happens to the ground around your house in the years after. Treated soil still sits next to untreated soil, and wet-dry cycles keep working on that ground right against your foundation.
The drainage work from earlier in this guide doesn't stop once the repair is finished. It becomes routine maintenance:
- Check gutters and downspouts every fall and spring. Clogs and loose extensions come back slowly, and you'll often miss them until a heavy storm.
- Recheck the grading every few years. Fill soil settles, and mulch beds tend to build up against the wall, so a slope that drained well when you finished it can flatten out over time.
- Keep indoor humidity steady. A dehumidifier in a damp basement, along with avoiding big seasonal swings, limits how much the framing swells and shrinks. That helps you tell real movement apart from a door that sticks every summer.
- Keep watching the repaired areas. Draw fresh pencil marks at the ends of any sealed crack and along trim gaps near the repair, then date them. Check them after the first wet season and the first hard freeze.
What steady looks like: marks that hold through a full year, floors that stay where they were left, and doors that close the same way in every season. If something starts moving again, look at the water first. If the water is under control and the movement continues, the soil underneath needs another look.
Most Foundations Are Repaired by Fixing What's Underneath Them
Most foundation problems are smaller than they look the first time you notice them. A crack that stays inside your pencil marks for a year is a concrete problem, and sealing it finishes the job. Water pooling against the house is a drainage problem, and gutters, downspout extensions, and better grading often fix it completely. If that describes your house, you can make the repair yourself and get on with your life.
Progressive movement is a different case. A crack that keeps widening, a floor that keeps sloping toward the same corner, or a door that sticks in every season all mean the ground under part of the house is still giving way. A patch can hide that for a while, but it won't stop it. The repair that holds is the one that reaches the weak soil at the depth where it actually sits.
So the real answer to how to repair a foundation is to fix whatever is actually moving. Sometimes that's the concrete or the water. When it's the soil, the soil is what has to be treated.
If you aren't sure which one you're dealing with, we can find out. Our geotechnical experts offer a free on-site assessment in Chicago, Phoenix, Denver, and Kansas City, and that assessment includes testing the soil under your foundation. You can see how the process works, or request your free assessment and we'll tell you what we find, including when you don't need us.
Get a free assessment and cost comparison for your foundation project. Discover exactly how much you can save with deep soil injection technology.